|
Size: 6117
Comment:
|
Size: 6116
Comment:
|
| Deletions are marked like this. | Additions are marked like this. |
| Line 31: | Line 31: |
| {{{#!wiki comments | {{{#!wiki comment |
Summer Camp: Creative Programming and User Experience 2014
at Sino-Dutch Design Center for Social and Cultural Computing, Science and Education New Town, Taicang, China
July 21-28, 2014
 It is a summer camp, so,
  you are supposed to have fun, and
  there will be no grades.
  Feel free to schedule the fun part.
Summary of the structure
- This Summer camp takes 8 days, including
- lectures about Processing
- lectures about Arduino
- lectures about processes, techniques and methods for User Experience design
- Students will be working on three challenges
- Challenge 1
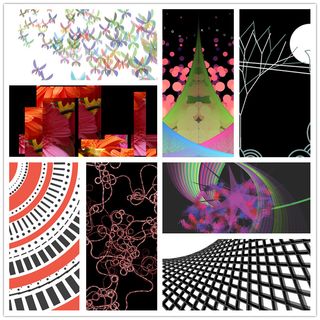
- Individual task. Creating static visual arts. At the end of this part, every student is expected to be able to
- Challenge 2
- Students work in pairs. Making the result of Challenge 1 interactive, by connecting the Processing program to Arduino sensors and/or actuators
- What to be delivered:
- a link to a Youku video that demonstrates the interactivity and explains the concept.
The video shall be titled as SDDC Summer Camp 2014: <a meaningful title> by <your names>.
- What to be delivered:
.
}}}
Schedule
Day 1: Processing Basics
Lectures Day1.zip
- 2D Graphics
- Variables and control flows
- Arrays and Functions
- Chinese Fonts and PDF
- Heads-down and Hands-on
- Read the Chapters 1, 2, 3, 4, 6(Fonts), 7(Translate, Rotate, Scale), 8, 10(Make an Array, Repetition and Arrays) and 11(Image Export) from the book Getting Started with Processing. Try to experiment with the examples.
- Start working on Challenge 1.
Day 2: Processing Advanced
- Lectures
- Animations
- Object-orientated Programming
- Mouse and keyboard interactivity
- Graphical user interface
- Heads-down and Hands-on
- Try to complete the book Getting Started with Processing, except section "Hello Arduino" in Chapter 11. We leave it for tomorrow. If you encounter difficulties, do not stick to it. Mark it, leave it and continue reading. You may visit the marked parts later when you gain more confidence.
- Working on Challenge 1. Preparing for delivering it tomorrow.
Day 3: Introducing Arduino
- Heads-up and showing-off
- Internal Exhibition of the results from Challenge 1. Selected (by voting) ones will share their stories behind the poster.
- Lectures
- Introducing Arduino
- Heads-down and hands on
- Reading: Getting Started with Arduino; Getting Started with Processing, chapter 11, section Hello Arduino.
- Working on challenge 2
Day 4: UX Design
- Heads-up and showing-off
- Demonstrating the results from Challenge 2. Everyone is supposed to explain everything to everyone.
- Lectures
- UX design, part 1
- Team-up
- Start preparing Challenge 3
- Be practical.
- Later you are supposed to prototype your concept using Processing and Arduino (partially, if not completely).
- Fix the concept by end of the day
- Start preparing Challenge 3
Day 5: UX Design
- Lectures
- UX design, part 2
- Team-up
- Continue Challenge 3, start prototyping
Day 6: UX Design
No lectures

- Team-up
- Challenge 3
Day 7: UX Design
No lectures

- Team-up
- Challenge 3
Day 8: Final Show
- Final Show
- Exhibit the output of Challenge 3.
- Good-bye and see you in November
Installing Processing
Download processing. Please make sure you are downloading the latest stable release. There are two versions, one with Java, one without. If you are not sure, download the one with Java.
- For those who know what the JDK is and wants to install Processing along with JDK: You need x32 version of the JDK no matter whether you are running an x32 or x64 system.
If you don't understand what the above comment is about, download the one with Java.
- Create a directory "Programs" on the C: disk, in the root. If "C:\Programs" exists already, skip this step.
- Extract the entire directory to C:\Programs (note, not "C:\Program Files"). if you are reinstalling Processing, remove the entire processing directory first.
- Create a shortcut on your desktop to "Processing.exe" for easy access.
Installing Arduino
Download Arduino software;
- Extract the entire directory to C:\Programs (note, not "C:\Program Files"). if you are reinstalling Arduino software, remove the entire arduino directory first.
- Create a shortcut on your desktop to "Arduino.exe" for easy access.
Install necessary Arduino drivers. Follow the instructions in page 23, Chapter 3 of Getting Started With Arduino
 If you are installing Arduino on Windows 8, the link below explains shortly how to install drivers for arduino on Windows 8.
 http://mytechblog.com/2013/03/install-arduino-drivers-on-windows-8/. (Thanks to Wouter van der Wal for pointing this out)
Books
- These books are for this summmer camp only, please do not distribute. All the PDFs are password encrypted.

